Basic Usage
- Saving/loading configurations
- Connecting to a camera
- Start/Stop image capture
- Camera Settings
- Logging Settings
- Timer
- Display
- Server
- Plugins
- Help
Saving/loading configurations
The current BIAS configuration, e.g. the camera, logging, timer, etc, settings can be loaded/saved to/from a json file using the File -> Load Configuration... and File -> Save Configuration... menu items. Note, the camera must be connect in order to load/save the a configuration.
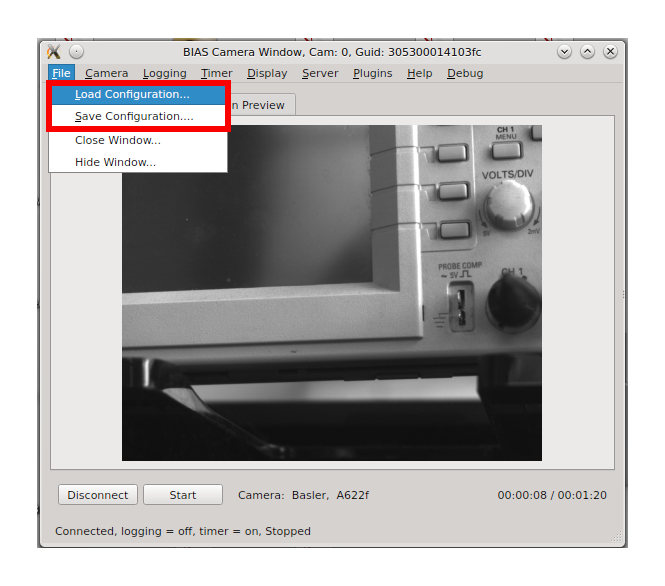
An example of BIAS’s json configuration format can be found here BIAS JSON Configuration Example.
Connecting to a camera
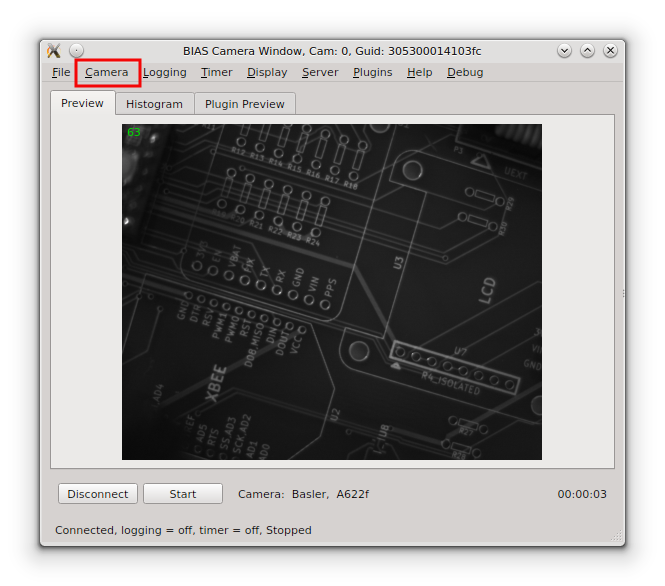
When BIAS is started it will try to enumerate all compatible cameras which are connected to the system. It will then open a separate GUI window for each camera. In to lower left corner of each GUI window is a Connect button.
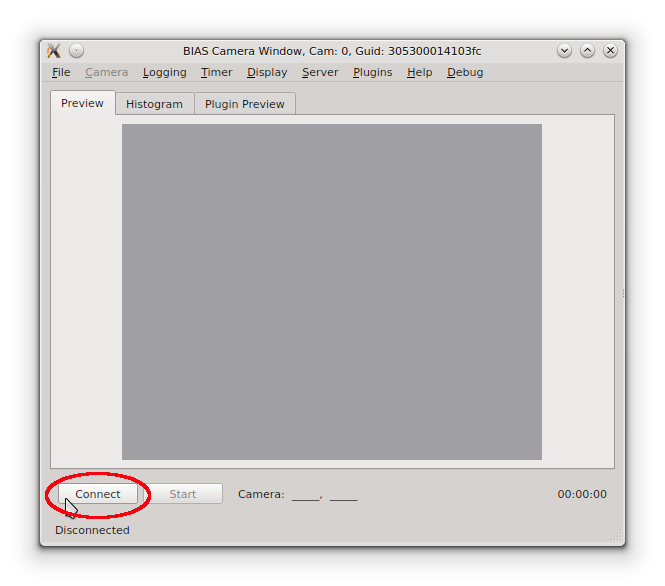
camera. To connect to a camera press the Connect button at the bottom of the GUI window. After connecting to the camera the vendor and model of the camera will be displayed in the text box to the right of the Start button as shown in the example below.

Note, that after connecting to the camera the text on the Connect button changes to Disconnect . This button can be used to disconnect from the camera when you are finished using it.
Start/Stop image capture
To start image capture press the Start button located in the lower corner of the GUI window - just to right of the Connect button.
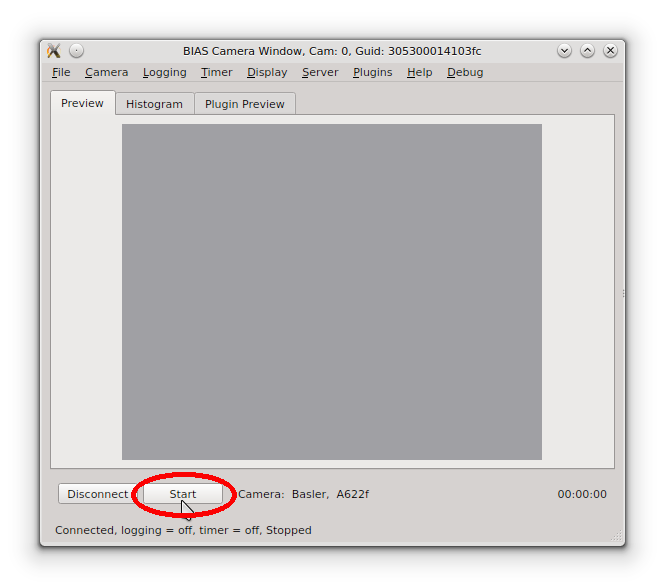
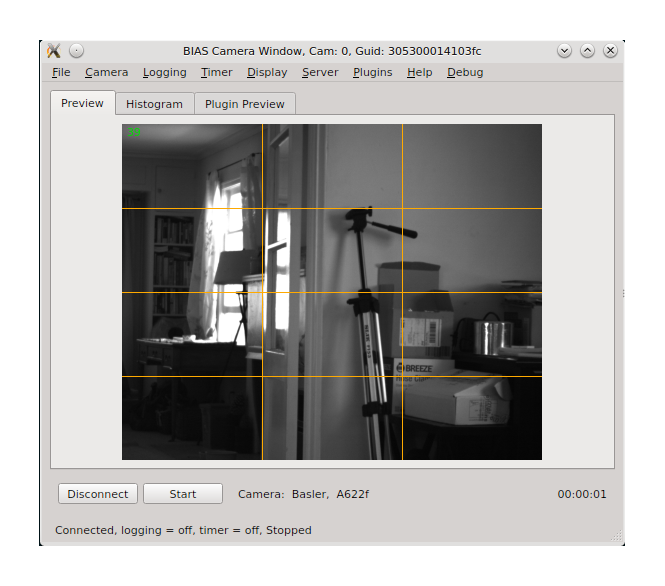
After image capture is started a live preview image will be shown on the Preview tab of the camera’s GUI window as shown below.
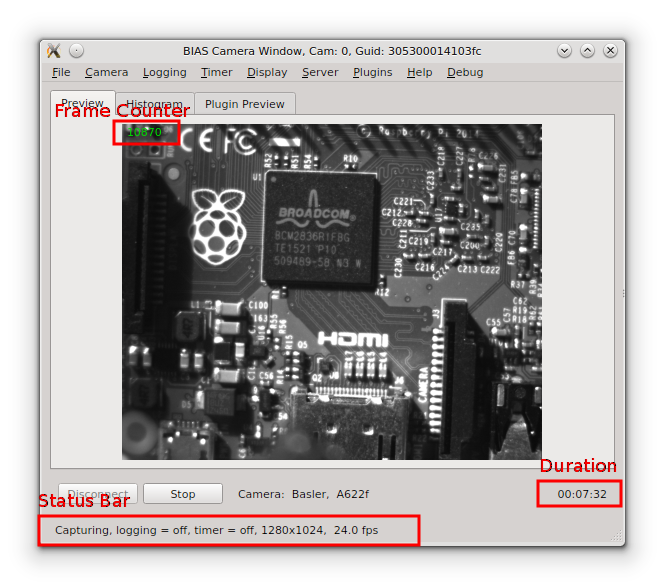
Notes:
- A frame counter, in the upper right corner of the preview image (green), displays the number or frames captured.
- The status bar, at the bottom of the window, shows the logging and timer status, the image size and the frame rate.
- Duration of the current capture session is shown in the lower right corner.
- The text in the Start button will change to Stop and this button can now be used to stop image capture.
Camera Settings
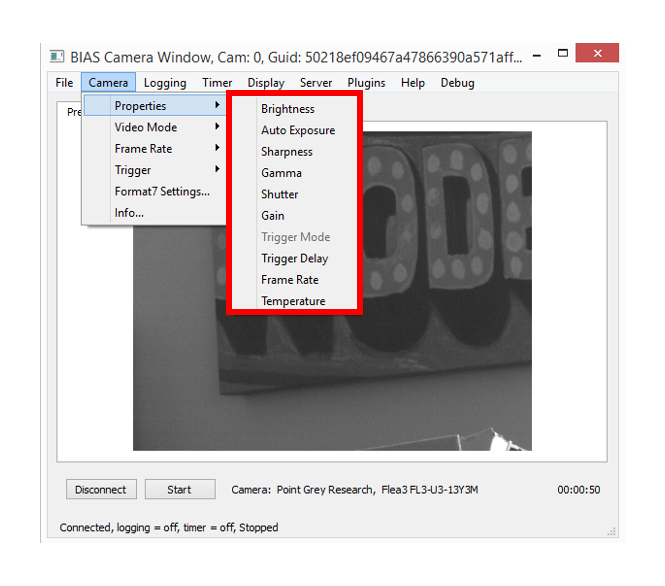
The camera settings can be adjusted from the Camera menu located near the top of the GUI window.
The Camera menu contains the following items
- Properties - gain, shutter, brightness, etc
- Video Mode - 640x480Y8, 1280x960Y8, 1280x960Y16, Format7, etc.
- Frame Rate - 30Hz, 60Hz, Format7, etc.
- Trigger - either internal or external
- Format7 Settings - dialog for Format7 specific settings such as mode, pixel format and ROI.

Properties
The camera properties can be set via the Camera -> Properties sub-menu item. The cmaera properties include features such as: gain, shutter, brightness, sharpness, auto-exposure, etc. Note, the specific camera properties available will vary by camera model.
Video Mode
The camera’s video mode can be set via the Camera -> Video Mode sub-menu item. The video mode setting allows the user to the mage size and pixel type. The specific video modes available will depend on the camera model. Note, BIAS currently only supports the Format7 video mode.

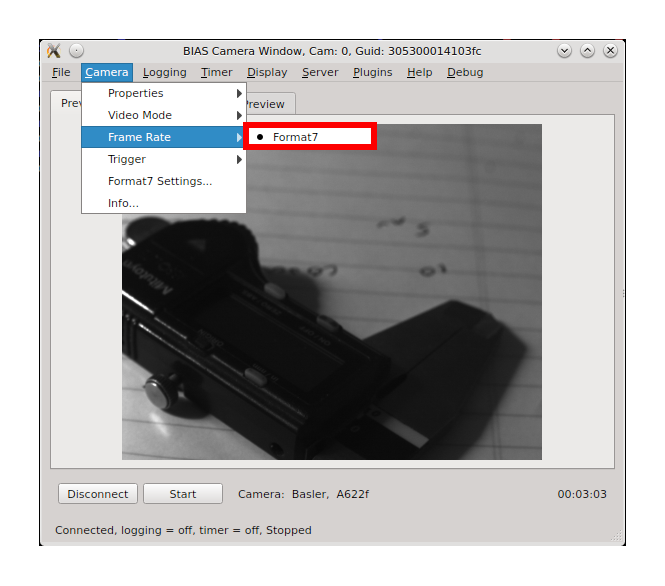
Frame Rate
The camera’s frame rate (when not in Format7 mode) can be set via the Camera -> Frame Rate sub-menu item. Note, this only applies to non-Format7 video modes. In Format7 video mode this should be set ‘Format7’ as the frame rate in Format7 mode is a camera and is set in the Cameara -> Properties -> Frame Rate menu item.
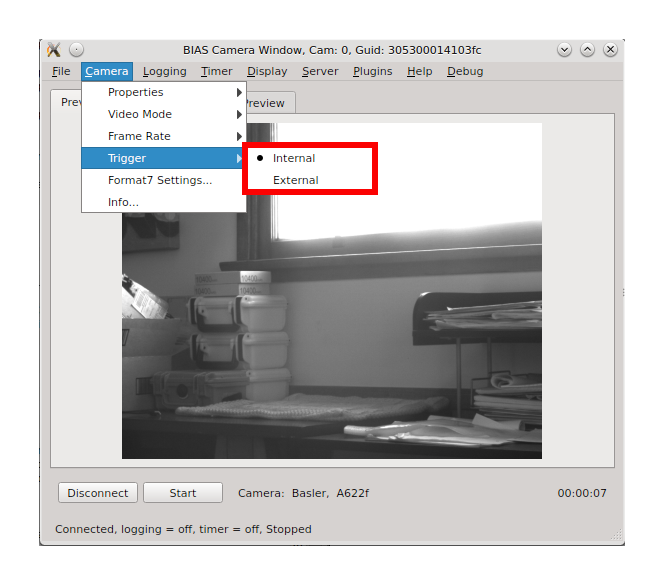
Trigger
The type of triggering used when acquiring images can be selected via the Camera -> Trigger sub-menu item. There are two tigger options: internal and external. When using internal trigger mode image acquistion is triggered by the camera itself according to the current frame-rate setting. When using external trigger mode, image acquisition is triggered using an external trigger source - usually connected to a GPIO on the camera.
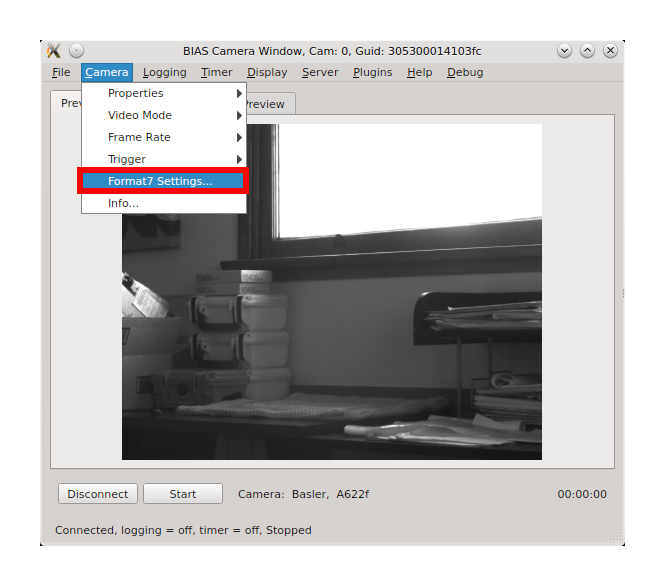
Format7 Settings ...
The Format7 Settings menu item, Camera -> Format7 Settings, opens a dialog which can be used to set the pixel format and region of interest (ROI) when operating in the Format7 video mode.
The Format7 Settings dialog is shown below.
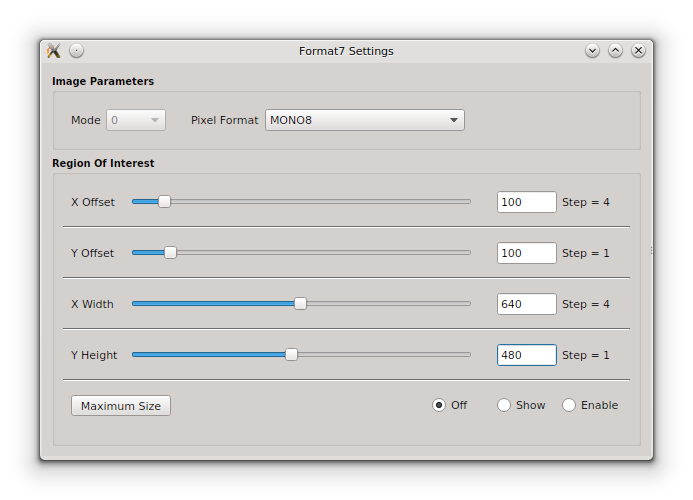
The format7 settings include the follow:
- Format7 Mode and Pixel Format. Note, the exact format7 modes and pixel formats will depend upon the camera mode.
- The Region Of Interest (or ROI) - this feature allows the user to restrict aquisition for a sub-region of the full image frame. The ROI is specified by selecting X Offset, Y Offset, X Width and Y Height. The ROI feature maybe set to “off”, “show”, or “enable”. When set to “off” the full image frame is captured. When set to “enable” the sub-region selected will be shown as a red rectangle in the preview window. When set to “enable” image capture is restriced to the selected sub-region.
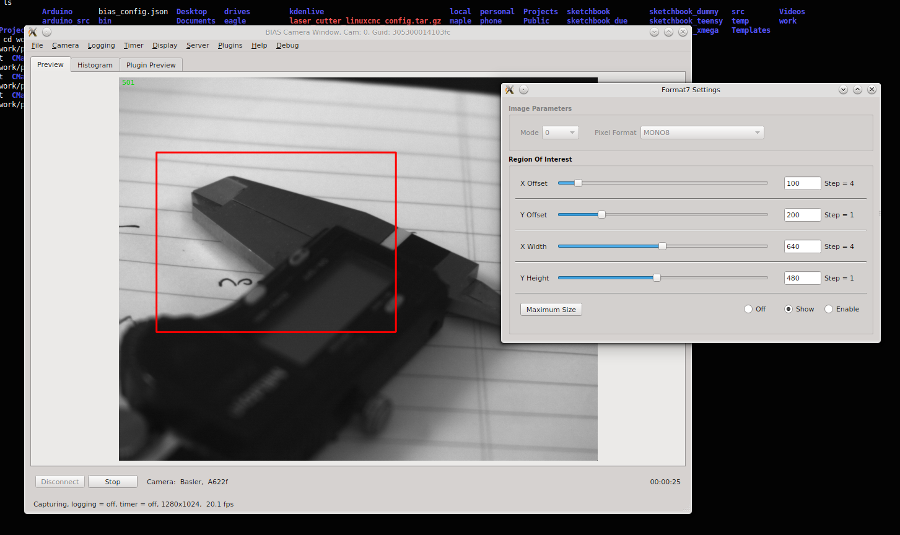
The example below demonstrates how the ROI sub-region is displayed in red on the full image when “show” is selected in the Format7 Settings dialog.
Logging Settings
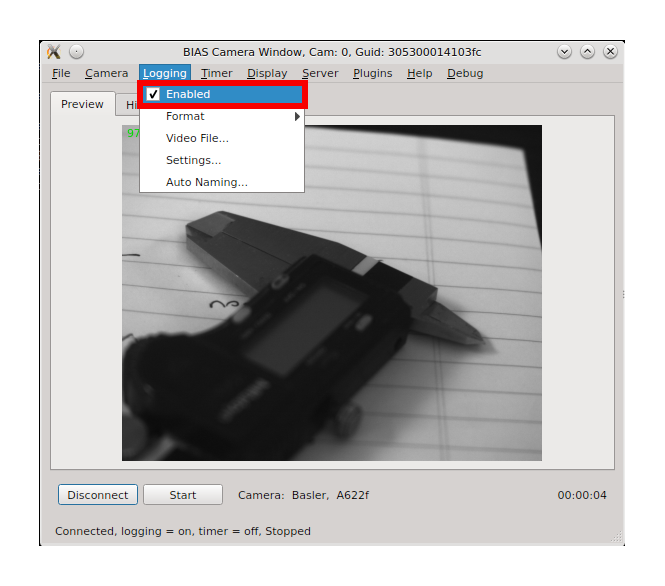
Enabled
Logging can be enabled via the Logging -> Enabled menu item as illustrated in the image below.
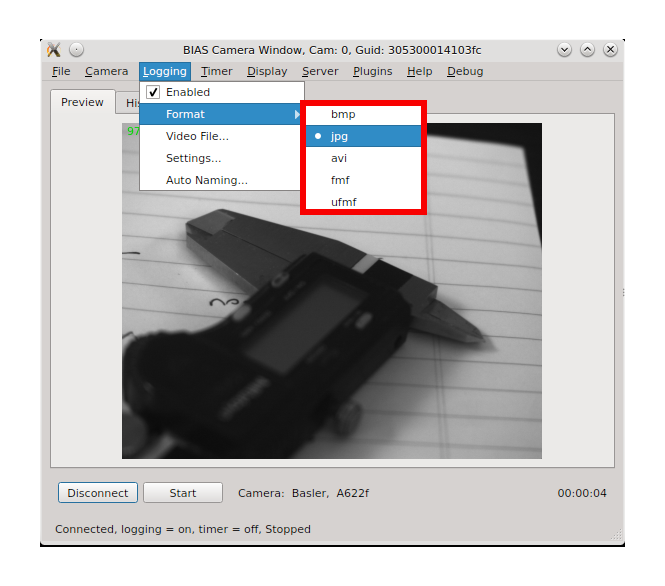
Format
BIAS supports several different logging file formats (bmp, jpg, avi, fmf, ufmf) which can be selected via the Logging -> Format sub-menu.
Video File ...
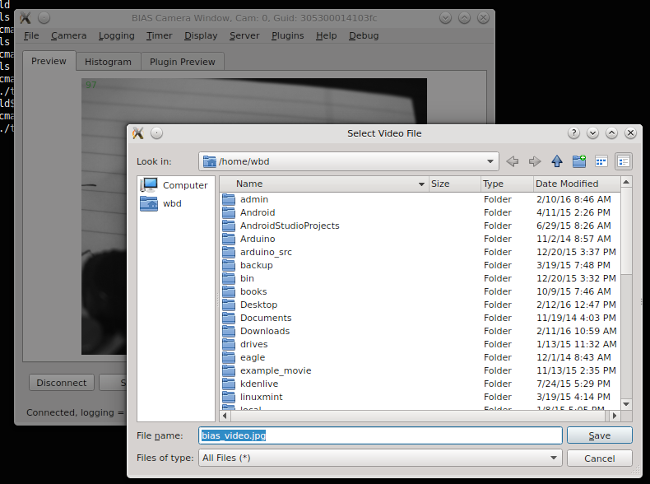
The name of the output video file (or directory of files depending on the file format) can be selected via the Logging -> Video File... menu item.
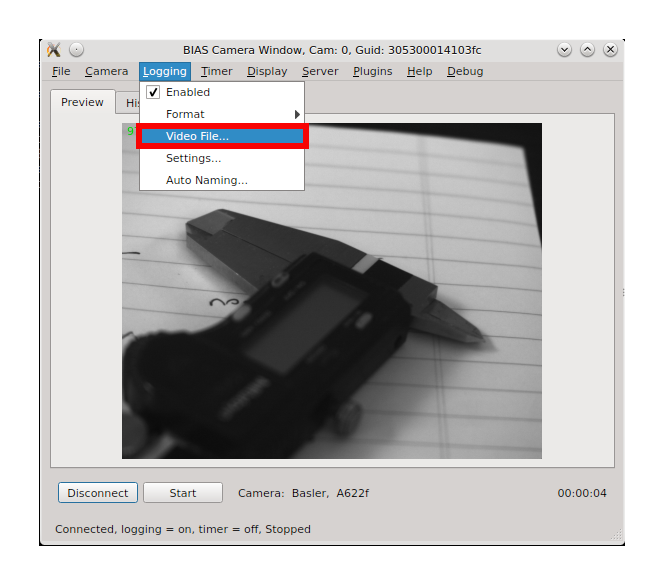
After selecting this item a standard file selection dialog will appear with which you can select the desired video file or directory.
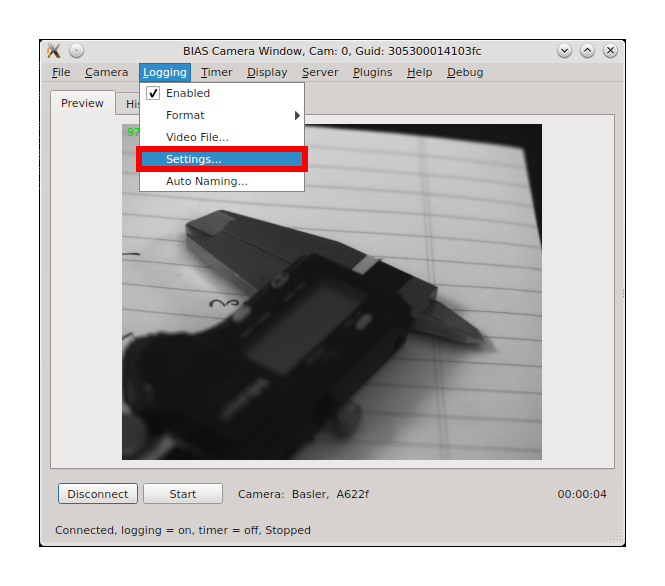
Settings ...
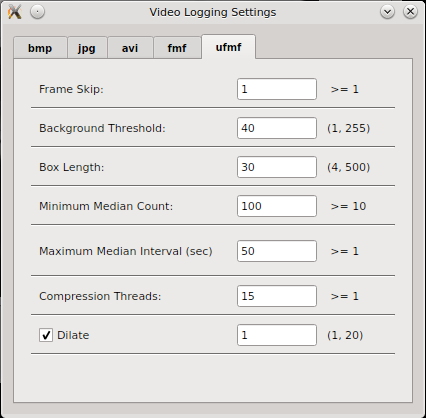
The settings specific to each logging format can be adjusted via the Video Logging Settings dialog. This dialog is opened via the Logging -> Settings... menu item.
The Video Logging Settings dialog contains a tab for logging format and should open on the tab of the currently selected format. The tab contains all of the configurable options for the given file format. A detailed description of these options, for each format, can be found here [TO DO].
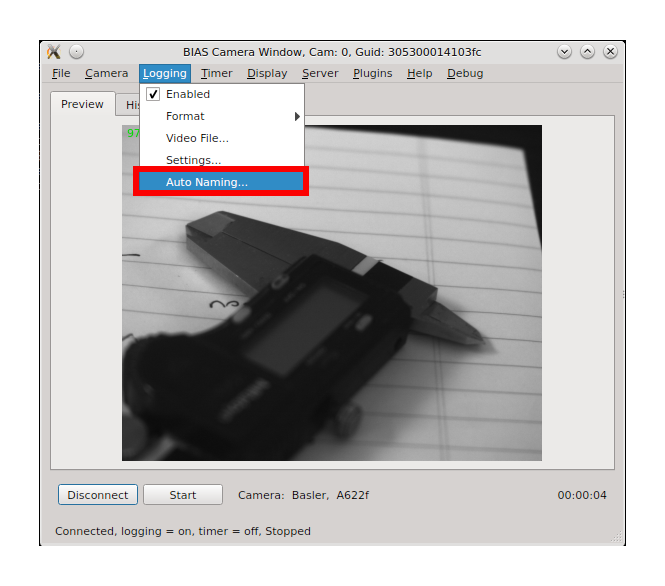
Auto Naming ...
BIAS supports several autonaming options which automatically add information to the video filename e.g. time, date, camera number or GUID, etc. The autonaming options can set via the Video File: Auto Naming dialog. This dialog can be opened by selecting the Logging -> Auto Naming... menu item.
The Video File: Auto Naming is shown below.
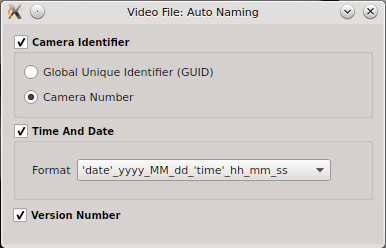
The dialog contains three checkable items:
- Camera Identifier: adds either the camera Global Unique Identifier (GUID) or camera number to the logging file/directory name.
- Time and Date: add time and date information to the file/directory name. Time and date format is selectable via a drop down menu.
- Version Number: adds version number to the file name e.g. 1,2, ... This option is is useful to prevent video files from being over written when they have the same name.
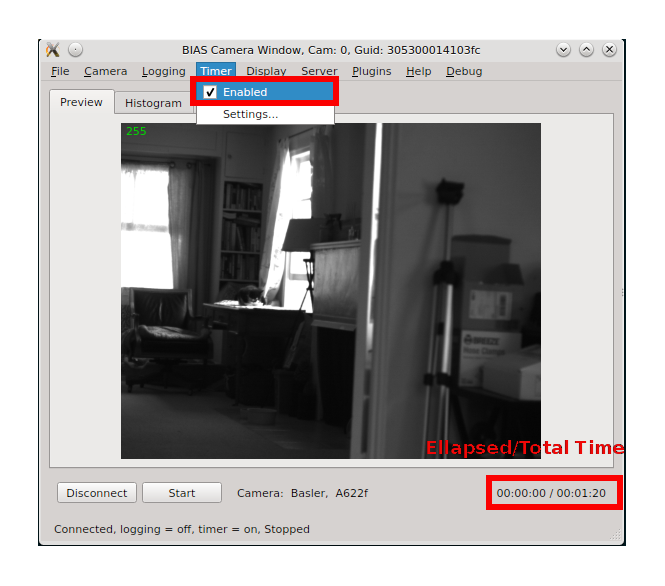
Timer
BIAS’s capture timer can be used to create timed video acquisitions.
Enabled
The capture timer can be enabled via the Timer -> Enabled menu item. Note, when the capture timer is enabled the “duration” text label in the lower right corner will be split to show both the ellapsed capture time and total capture duration as set int the timer settings as follows: “ellapsed time/total capture duration”.
Settings
The timer settings can be specified via the Timer Settings dialog. This dialog can be opened by selecting the Timer -> Settings... menu item.
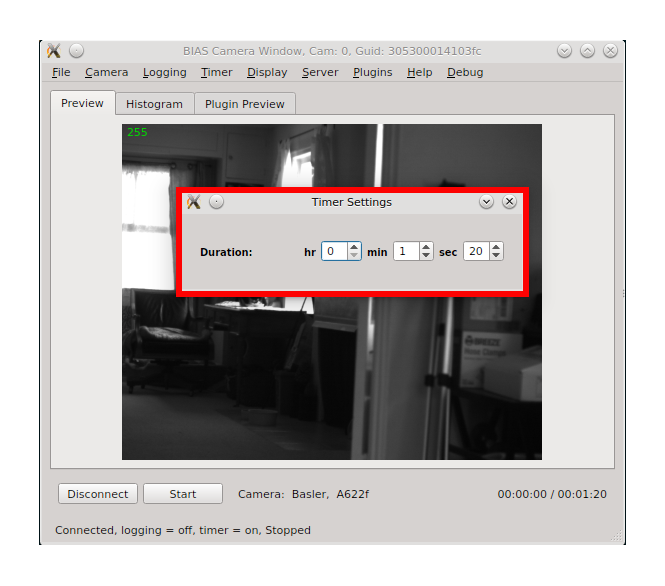
The total capture duration is specified in hours (hr), minutes (min) and seconds (sec).
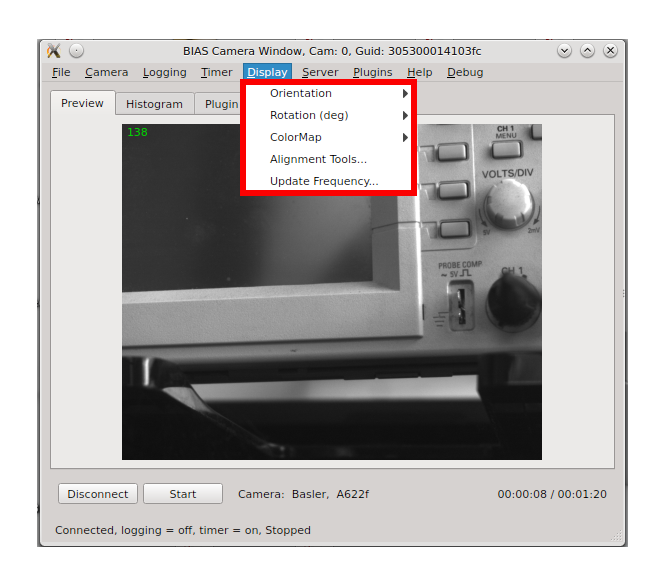
Display
The display menu provides options for changing how the image preview appears to the user. The available options include orientation, rotation, colormap, as well as several alignment tools.
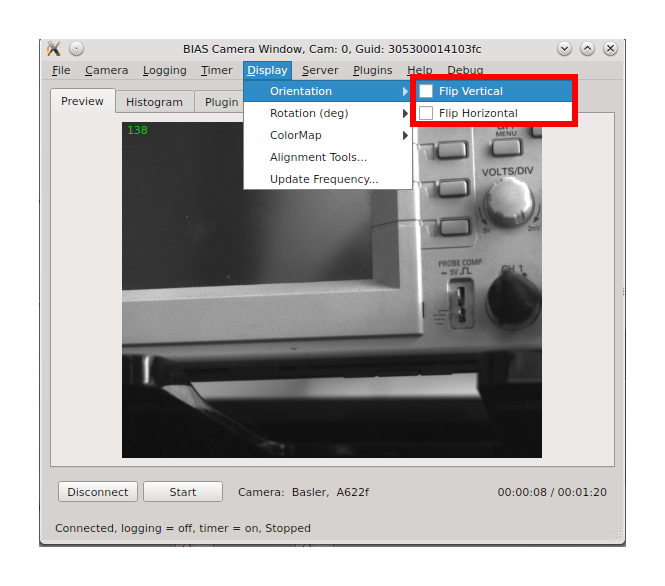
Orientation
The orientation sub-menu provides the user with options to flip the preview image either vertically and/or horizontally. To flip the image check the corresponding checkbox in the sub-menu item.
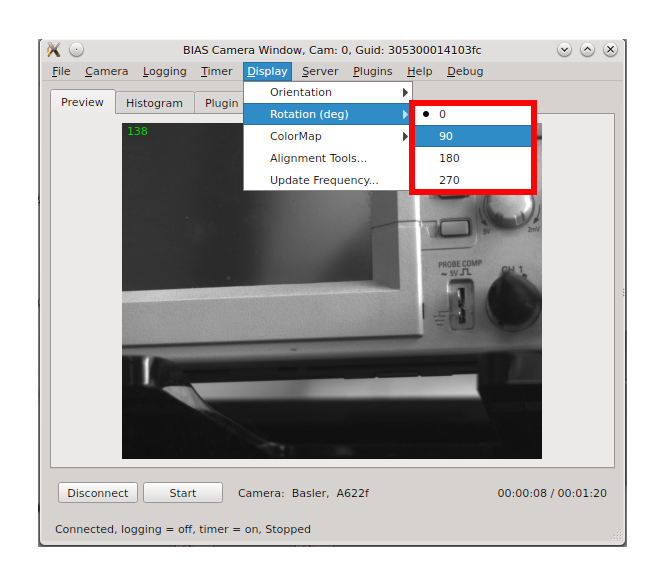
Rotation
The rotation sub-menu provides the user with options to rotate the preview image either 0, 90, 180 or 270 degrees. A dot is shown next to the current rotation setting.
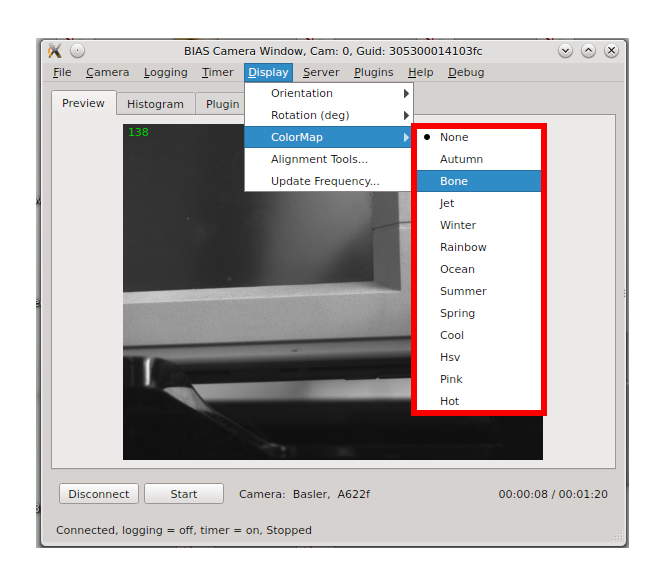
ColorMap
The colormap sub-menu provides the user with a list of colormap which can be applied to the preview window. The list of options include: None (no colormap), Autumn, Bone, Jet, Winter, Rainbow, Ocean, Summer, Spring, Cool, Hsv, Pink, and Hot.
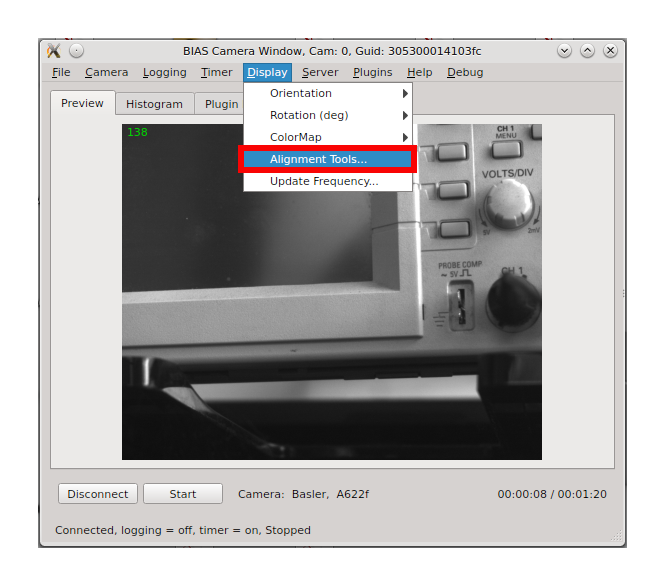
Alignment Tools...
The alignment tools menu item opens the Alignment Tools dialog which contains several tools which can be used to help during camera alignment.
The alignment tools dialog current contains two tools: Grid and Ellipse.
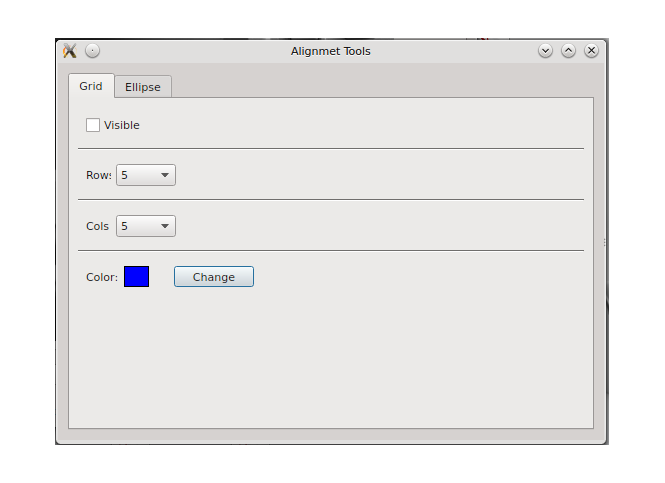
The Grid alignment tools allows the user to display a grid of lines on the preview image. The user can choose the color and number of grid lines. An example of preview image with an alignment grid (color = orange, row = 3, col = 2) is shown below.
The Ellipse alignment tool allows the user to display an ellipse on the preview image. The user can choose the color and shape and position of the ellipse. Note, the ellipse alignment tool is not yet fully implemented.
Server
BIAS is capable of running a simple http server which enables control of the software via http requests from external applications. Documentation for the http commands can be found here External Control HTTP Commands The Server menu contains the controls and settings for this server.
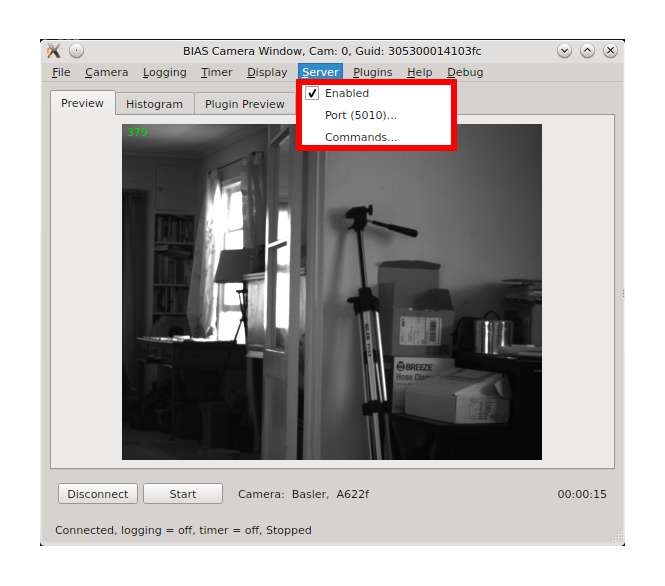
Enabled
The enabled menu item allows the user to enable/disable the external control server. When the checkbox is ticked the external control http server is enabled - this is the default setting.
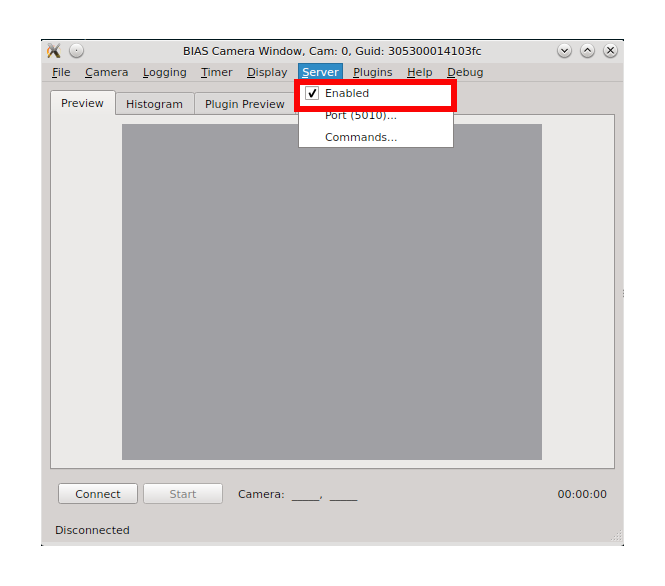
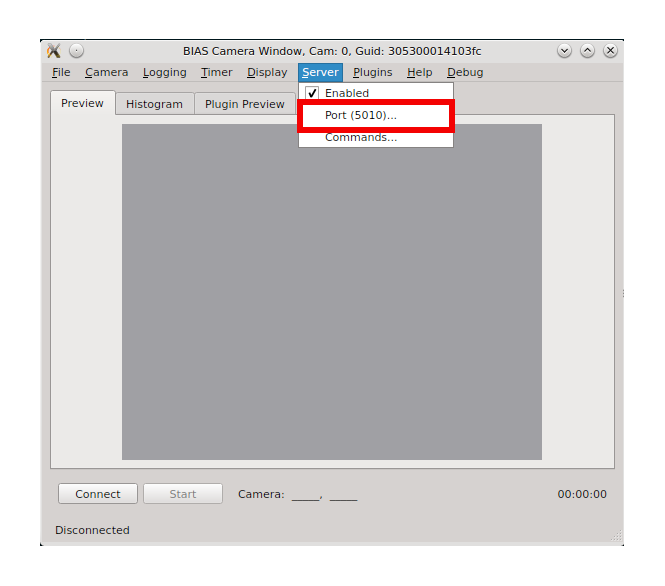
Port
The port menu item opens the HTTP Server Settings dialog. Note, this is not yet implemented. Currently on the port for the specific camera is displayed next to the Settings... menu item.
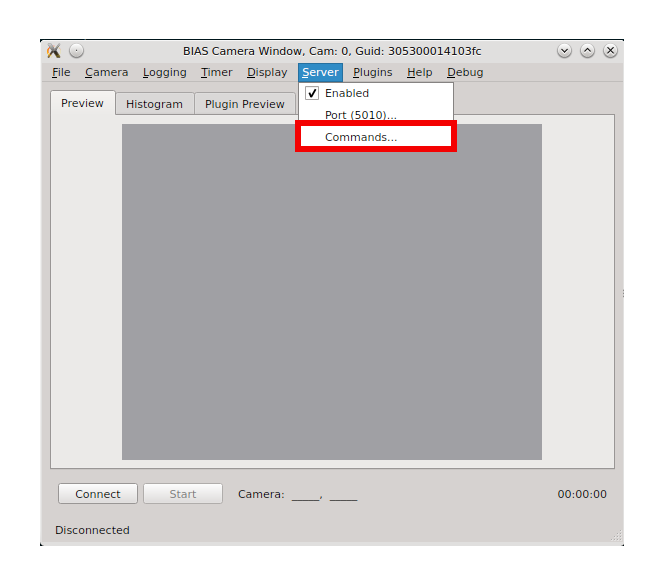
Commands
The commands menu item opens a window with a summary of the external control server commands. Note, this is not yet implemented.
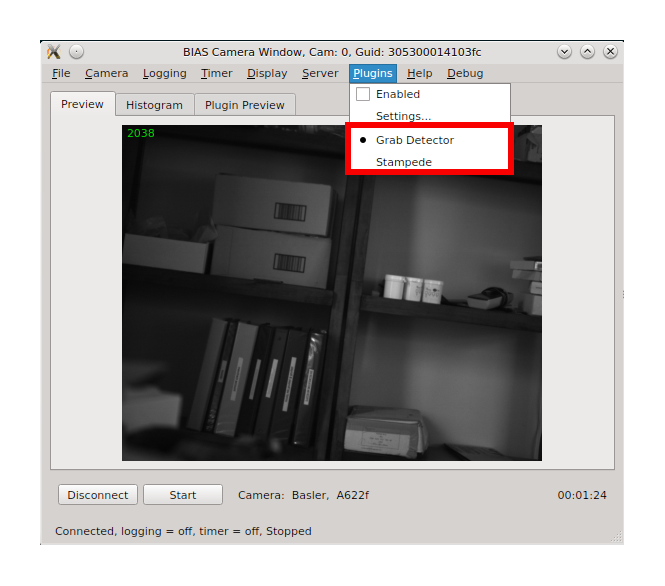
Plugins
The plugins menu contains controls for enabling, configuring and selecting plugins.
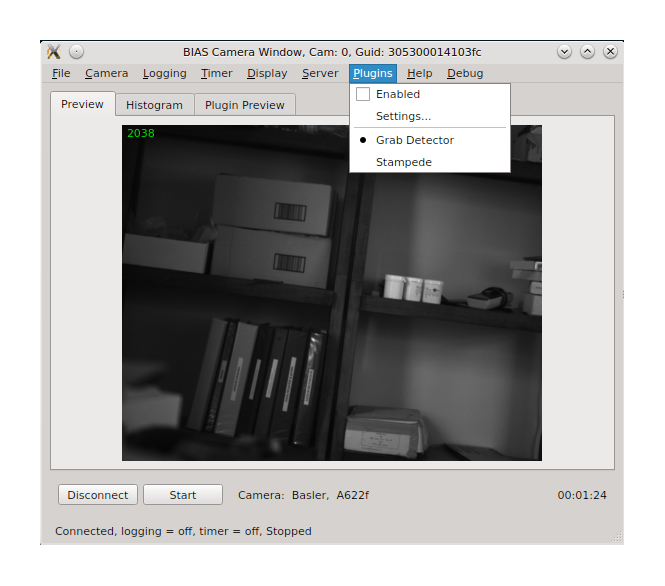
Enabled
The enabled menu item allows the user to enable the currently selected plugin. When the checkbox is ticked the plugin is enabled. Note, the currently selected plugin is shown in the plugin list at the bottom of the plugin menu.

Settings...
Opens the settings dialog for currently selected plugin. Note, each plugin will have its own settings dialog.
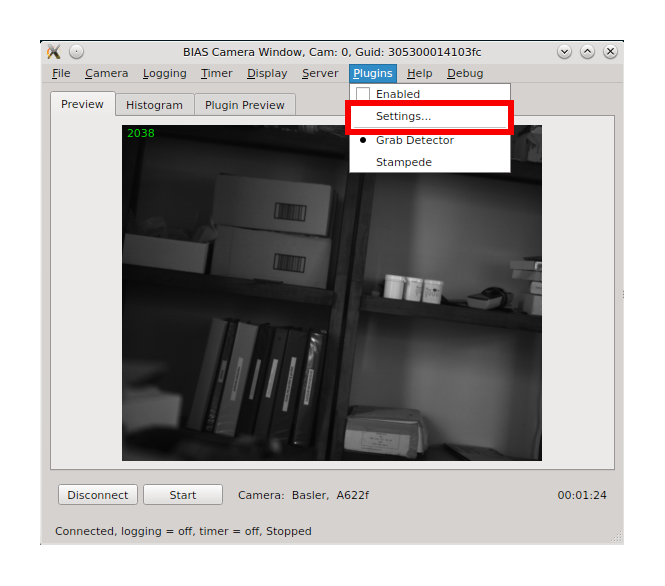
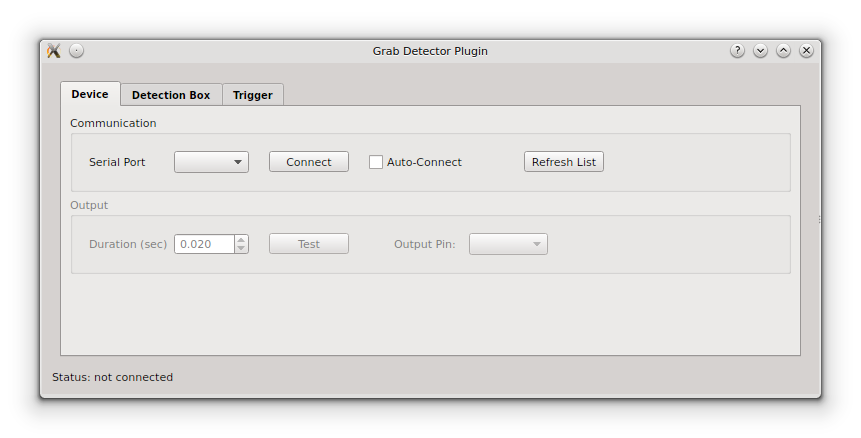
An example of the settings dialog for the Grab Detector plugin is shown below.
Plugin List
The plugin list is shown at the bottom of the plugin menu - separated from the rest of the menu via a horizontal line. The plugin list show all currently available plugins. A dot is show next to the currently active plugin. Note, only one plugin may be active at an time.
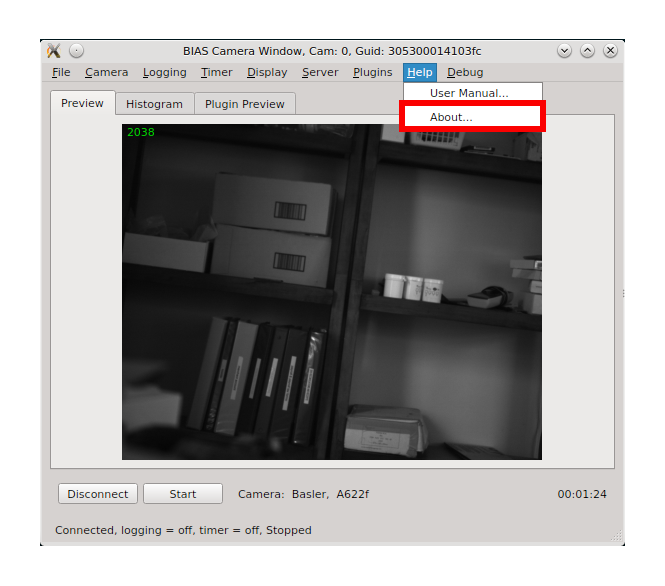
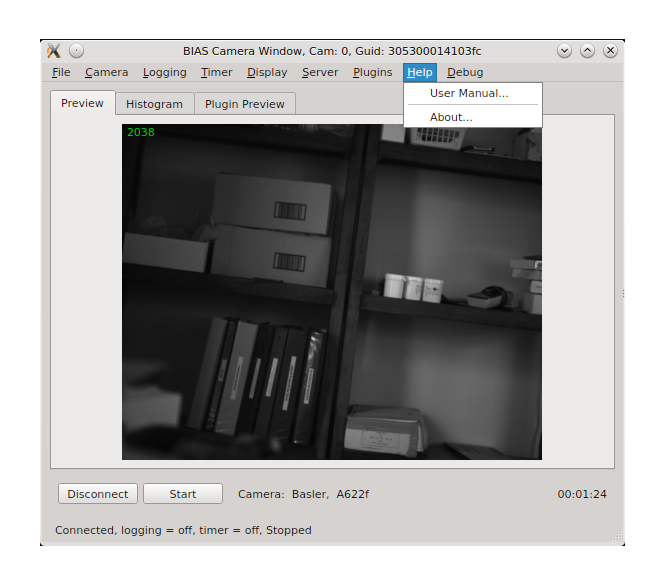
Help
The help menu provides link to various help resources.
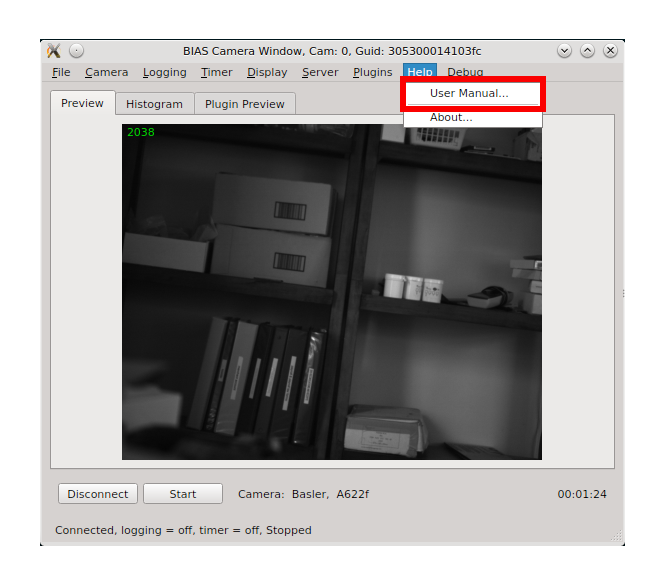
User Manual...
The user manual menu items opens a browser window open to BIAS’s documentation. Note, this is not yet implemented.
About...
Opens the about dialog showing the current version number of the software etc. Note, this is not yet implemented.